vue 是数据驱动视图, 所以对于 vue 来说组件间的数据通信非常重要。熟练的掌握 vue2 组件通信对于我们来说至关重要。那么组件之间如何进行数据通信的呢?本篇文章将讲述 vue2 常用的组件通讯的方式,vue3组件通讯在这里一起来看看吧!!!!!!!
props
props 是组件通信中最常用的通信方式之一,有这么一句话:父传子全世界最简单的方法就是props
1
2
3
4
5
6
7
8
9
10
11
12
13
14
15
16
17
18
19
20
21
22
23
24
25
26
27
28
29
30
31
|
<template>
<div>
<Child :msg="message" />
</div>
</template>
<script>
import Child from "./Child";
export default {
components: {
Child,
},
data() {
return {
message: "父组件信息",
};
},
};
</script>
<template>
<div>
{{ msg }}
</div>
</template>
<script>
export default {
props: ["msg"],
};
</script>
|
这里子组件接受数据使用 props,就会涉及到 props 的两种使用形式一种就是如上props:['msg'],另一种就是完整形式props:{mag:{type:String.default:""}},两种方式都行,看你的业务需求。
注:Object/Array 类型不能直接定义空对象或空数组,必须使用 工厂函数 return 回一个默认值。这里如不这样写可能会报错,注意一下。😀
1
2
3
4
5
6
7
8
9
10
| props: {
arrData: {
type: Array,
default: () => [],
},
objData: {
type: Object,
default: () => ({}),
},
}
|
$emit
$emit叫自定义事件,可以实现子组件向父组件传值。在子组件中通过$emit 注册事件,将数据作为参数传入,在父组件中通过$event接收。
1
2
3
4
5
6
7
8
9
10
11
12
13
14
15
16
17
18
19
20
21
22
23
24
25
26
27
28
29
30
31
32
33
34
35
36
37
|
<template>
<div>
<Child @data="getChildData" />
</div>
</template>
<script>
import Child from "./Child";
export default {
components: {
Child,
},
methods: {
getFromChild(val) {
console.log(val);
},
},
};
</script>
<template>
<div>
<button @click="sendFun">send</button>
</div>
</template>
<script>
export default {
methods: {
sendFun() {
this.$emit("data", "我是子组件数据");
},
},
};
</script>
|
双向数据传递
当你掌握了 props 与$emit 的使用,这个你必须知道,props 是只读属性,是单项数据流,如此而来并不易于我们开发。Vue 官方提供了两种解决办法,话不多说上代码!!!
@update
1
2
3
4
5
6
7
8
9
10
11
12
13
14
15
16
17
18
19
20
21
22
23
24
25
26
27
28
29
30
31
32
33
34
35
36
37
38
39
40
41
42
43
|
<template>
<div>
<Child :msg="message" @update:msg="changeFun" />
</div>
</template>
<script>
import Child from "./views/Child";
export default {
components: {
Child,
},
data() {
return {
message: "你好",
};
},
methods: {
changeFun(data) {
this.message = data;
},
},
};
</script>
<template>
<div>
{{ msg }}
<button @click="changeFun">点击按钮更改父组件传递来的数据</button>
</div>
</template>
<script>
export default {
props: ["msg"],
methods: {
changeFun() {
this.$emit("update:msg", "你不好");
},
},
};
</script>
|
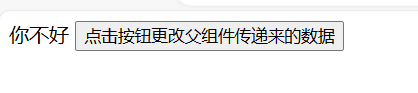
@update:msg="changeFun"通过 changeFun(自己随便定义)这个方法的$event 可以接收到要修改的数据,然后通过 this.message = data修改原有父组件数据

.sync 修饰符
与@update 类似,.sync 可实现双向数据传递,如果直接传入对象就v-bind.sync=对象名
1
2
3
4
5
6
7
8
9
10
11
12
13
14
15
16
17
18
19
|
<template>
<div>
<Child :msg.sync="message" />
</div>
</template>
<script>
import Child from "./views/Child";
export default {
components: {
Child,
},
data() {
return {
message: "你好",
};
},
};
</script>
|
$ref
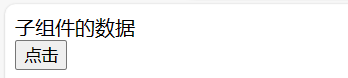
$ref 可实现父组件调用子组件的方法,传递数据实现父向子传递数据
1
2
3
4
5
6
7
8
9
10
11
12
13
14
15
16
17
18
19
20
21
22
23
24
25
26
27
28
29
30
31
32
33
34
35
36
37
38
39
40
41
42
|
<template>
<div>
<Child ref="child" />
<button @click="sendData">点击</button>
</div>
</template>
<script>
import Child from "./views/Child";
export default {
components: {
Child,
},
methods: {
sendData() {
this.$refs.child.childFun("父组件传递到子组件的数据");
},
},
}
</script>
<template>
<div>
{{ message }}
</div>
</template>
<script>
export default {
data() {
return {
message: "子组件的数据",
};
},
methods: {
childFun(data) {
this.message = data;
},
},
};
</script>
|
这里this.$refs.child可以拿到当前子组件的组件实例
$children与$parent
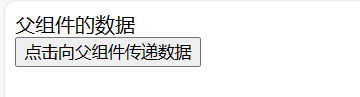
$parent可以针对子组件向父组件传递数据,$children 可以拿到当前父组件的所有子组件,并且以数组的形式呈现出来,实现父组件向子组件传递数据。很遗憾 Vue3 已经废除了此 Api
1
2
3
4
5
6
7
8
9
10
11
12
13
14
15
16
17
18
19
20
21
22
23
24
25
26
27
28
29
30
31
32
33
34
35
36
37
38
39
40
|
<template>
<div>
<Child />
<button @click="sendData">点击</button>
</div>
</template>
<script>
import Child from "./views/Child";
export default {
components: {
Child,
},
methods: {
sendData() {
this.$children[0].childFun("父组件传递数据给子组件");
},
},
};
</script>
<template>
<div>
{{ message }}
</div>
</template>
<script>
export default {
data() {
return {
message: "子组件的数据",
};
},
methods: {
childFun(data) {
this.message = data;
},
},
};
</script>
|
因为 this.$children可以拿到所有子组件的组件实例组成的数组,所以需要 this.$children[0]拿到子组件实例。
1
2
3
4
5
6
7
8
9
10
11
12
13
14
15
16
17
18
19
20
21
22
23
24
25
26
27
28
29
30
31
32
33
34
35
36
37
38
39
40
41
|
<template>
<div>
{{ message }}
<Child />
</div>
</template>
<script>
import Child from "./views/Child";
export default {
components: {
Child,
},
data() {
return {
message: "父组件的数据",
};
},
methods: {
changeData(data) {
this.message = data;
},
},
};
</script>
<template>
<div>
<button @click="sendData">点击向父组件传递数据</button>
</div>
</template>
<script>
export default {
methods: {
sendData() {
this.$parent.changeData("子向父传递的数据");
},
},
};
</script>
|
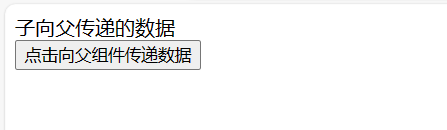
this.$parent可以拿到父组件实例
v-model
v-model 可实现父子间传递数据, 话不多说上代码!!!
1
2
3
4
5
6
7
8
9
10
11
12
13
14
15
16
17
18
19
20
21
22
23
24
25
26
27
28
29
30
31
32
33
34
35
36
37
38
39
40
41
42
|
<template>
<div>
{{ message }}
<Child :value="message" @input="inputValue" />
</div>
</template>
<script>
import Child from "./views/Child";
export default {
components: {
Child,
},
data() {
return {
message: "Hi",
};
},
methods: {
inputValue(value) {
this.message = value;
},
},
};
</script>
<template>
<div>
<input type="text" :value="msg" @input="changeInput" />
</div>
</template>
<script>
export default {
props: ["value"],
methods: {
changeInput(e) {
this.$emit("input", e.target.value);
},
},
};
</script>
|
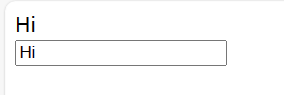
不难看出,我通过 props 和$emit 实现了父子组件的一个数据传递,props 的名为 value,自定义事件名为 input,效果如下,但这里哪有涉及 v-model 呢?
我们只需对父组件代码稍作修改。
1
2
3
4
5
6
7
8
9
10
11
12
13
14
15
16
17
18
19
20
21
22
23
24
25
|
<template>
<div>
{{ message }}
<Child v-model="message" />
</div>
</template>
<script>
import Child from "./views/Child";
export default {
components: {
Child,
},
data() {
return {
message: "Hi",
};
},
methods: {
inputValue(value) {
this.message = value;
},
},
};
</script>
|
可以看出我将:value="message" @input="inputValue"替换成了 v-model="message",效果不变。其实 v-model 可实现双向通信,也是一种语法糖。很重要的一点,如果使用 v-model,你的自定义事件名必须为input,props 的名也必须为value。
provide 与 inject
provide 与 inject 可以实现父组件与后代组件的通讯,也叫依赖注入。上代码!!!!
1
2
3
4
5
6
7
8
9
10
11
12
13
14
15
16
17
18
19
20
21
22
23
24
25
26
27
28
29
30
31
32
33
34
35
36
37
38
39
40
41
42
43
44
45
46
|
<template>
<div>
<Child />
</div>
</template>
<script>
import Child from "./views/Child";
export default {
components: {
Child,
},
provide: {
msg: "你好孙组件",
},
};
</script>
<template>
<div>
<Child1 />
</div>
</template>
<script>
import Child1 from "../Child1/index.vue";
export default {
components: {
Child1,
},
};
</script>
<template>
<div>
<h3>我是孙组件</h3>
这是来组爷爷组件的数据:{{ msg }}
</div>
</template>
<script>
export default {
inject: ["msg"],
};
</script>
<style></style>
|
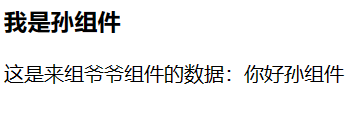
可以看出我在祖先组件使用了 provide: {msg: '你好孙组件' },在后代组件就可以inject: ['msg'],且任何后代组件都可以使用inject: ['msg']
EventBus
EventBus 为全局事件总线,适用于任意组件间通讯, 就像是所有组件共用相同的事件中心,作用面积大,可解决一些较为复杂的业务逻辑。
1
2
3
4
5
6
7
8
9
10
11
12
13
14
15
16
17
18
19
20
21
22
23
24
25
26
27
28
29
30
31
32
33
34
35
|
Vue.prototype.$bus = this } }).$mount('#app')
<template>
<div>
<Child />
<button @click="sendData">点击</button>
</div>
</template>
<script>
import Child from "./views/Child";
export default {
components: {
Child,
},
methods: {
sendData() {
this.$bus.$emit("bus", "你好");
},
},
};
</script>
<template>
<div></div>
</template>
<script>
export default {
mounted() {
this.$bus.$on("bus", (data) => {
console.log(data);
});
},
};
</script>
|
可以看出我在 Vue.prototype.$bus = thisvue 原型上绑定名为$bus,值为this(这里的this指向Vue实例)
通过 点击事件this.$bus.$emit('bus', '你好')发送数据,当其他组件挂载时接收数据this.$bus.$on('bus',(data) => { console.log(data)}),以上举例我是通过父子组件演示,EventBus全局事件总线适用于任意组件通讯
写在最后
本文阐述了 vue2 的常用组件通讯,还有其他不常用的可自行查阅其他文档,除此之外我未曾提到状态管理,我个人感觉,状态管理过于复杂,没花太多篇章讲述,但状态管理是项目阶段尤为重要的东西,同样需要熟练掌握,如果你觉得上述有用,希望这篇文章,能帮助到你。